How to configure Microsoft Defender SmartScreen via Microsoft Intune?
The purpose of this blog post is to inform you how to configure Microsoft Defender SmartScreen for Windows via the Settings Catalog option with Microsoft Intune.
In this blog post, I will use the Settings Catalog option. It is possible to configure SmartScreen via several methods. In the past, we also had the options to configure it via Endpoint Protection and Administrative Templates, but those configuration profiles will be or are phased out.
This means that there are only two options left: Settings Catalogs or Microsoft Security Baselines. The Security Baseline is, in my point of view, not an option because it does not have all the configuration settings available.
Both methods use MDM technology. This means that it cannot be configured from the Defender for Endpoint portal because those need the Microsoft Sense Technology. So this, in my point of view, is not an argument to use the security baselines.
Another reason why I prefer the Settings Catalog option is that I want to have all the configuration of a specific feature in one profile instead of multiple configuration profiles and a chance to get conflicts or missing settings.
Requirements:
- Windows 11 Professional or Enterprise
- Microsoft Intune license
What is Microsoft Defender SmartScreen, and why should I configure it?
Microsoft Defender SmartScreen is a security solution that helps protect your users against phishing, malicious websites, malicious applications, and downloading (potentially) malicious files.
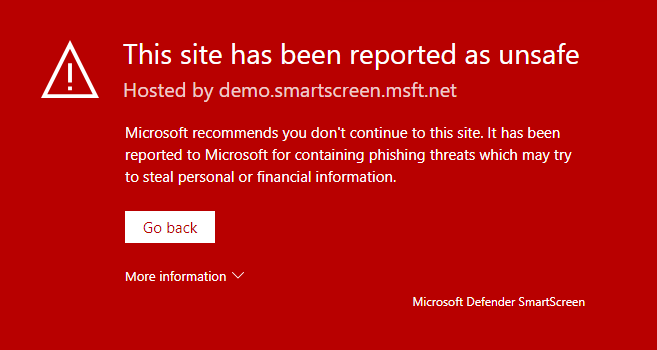
Microsoft Defender SmartScreen provides a warning page against for example websites that might engage in phishing attacks or attempt to distribute malware through a socially engineered attack.
When Microsoft Defender SmartScreen is configured, you will have the following benefits:
- Better anti-phishing and anti-malware protection
- Reputation-based URL and app protection
- Fully integrated into Windows
- Manageable via Microsoft Intune
- Microsoft Defender SmartScreen is constantly learning
- Blocking URLs associated with potentially unwanted applications
Microsoft Defender SmartScreen checks the reputation of any website, application, or web-based app the first time it’s run. Microsoft Defender SmartScreen will check the digital signatures and some other factors against a Microsoft-maintained service. If an app or website has no reputation or is known to be malicious, Microsoft Defender SmartScreen will warn the user or block the app from running entirely.
So, Microsoft Defender SmartScreen is an extra security layer that needs to be implemented, in my opinion, to protect your users against the dark part of the internet.
What configuration setting are available?
Administrative Templates - Windows Components > File Explorer
Configure Windows Defender SmartScreen
This policy allows you to turn Windows Defender SmartScreen on or off. SmartScreen helps protect PCs by warning users before running potentially malicious programs downloaded from the Internet. This warning is presented as an interstitial dialog shown before running an app that has been downloaded from the Internet and is unrecognized or known to be malicious. No dialog is shown for apps that do not appear to be suspicious. Some information is sent to Microsoft about files and programs run on PCs with this feature enabled.
Microsoft Edge - SmartScreen Settings
Configure Microsoft Defender SmartScreen
This policy setting lets you configure whether to turn on Microsoft Defender SmartScreen. Microsoft Defender SmartScreen provides warning messages to help protect your users from potential phishing scams and malicious software. By default, Microsoft Defender SmartScreen is turned on.
Configure Microsoft Defender SmartScreen to block potentially unwanted apps
This policy setting lets you configure whether to turn on blocking for potentially unwanted apps with Microsoft Defender SmartScreen. Potentially unwanted app blocking with Microsoft Defender SmartScreen provides warning messages to help protect users from adware, coin miners, bundleware, and other low-reputation apps that are hosted by websites. Potentially unwanted app blocking with Microsoft Defender SmartScreen is turned off by default.
Enable Microsoft Defender SmartScreen DNS requests
This policy lets you configure whether to enable DNS requests made by Microsoft Defender SmartScreen. Note: Disabling DNS requests will prevent Microsoft Defender SmartScreen from getting IP addresses, and potentially impact the IP-based protections provided.
Enable new SmartScreen library
Allows the Microsoft Edge browser to load new SmartScreen library (libSmartScreenN) for any SmartScreen checks on site URLs or application downloads.
Force Microsoft Defender SmartScreen checks on downloads from trusted sources
This policy setting lets you configure whether Microsoft Defender SmartScreen checks download reputation from a trusted source.
Prevent bypassing Microsoft Defender SmartScreen prompts for sites
This policy setting lets you decide whether users can override the Microsoft Defender SmartScreen warnings about potentially malicious websites.
Prevent bypassing of Microsoft Defender SmartScreen warnings about downloads
This policy lets you determine whether users can override Microsoft Defender SmartScreen warnings about unverified downloads.
Smart Screen
Enable App Install Control
This policy setting is intended to prevent malicious content from affecting your user’s devices when downloading executable content from the internet.
Enable Smart Screen In Shell
Allows IT Admins to configure SmartScreen for Windows.
Prevent Override For Files In Shell
Allows IT Admins to control whether users can ignore SmartScreen warnings and run malicious files.
Smart Screen - Enhanced Phishing Protection
Notify Malicious
Configures Enhanced Phishing Protection notifications for malicious content.
Notify Password Reuse
Configures Enhanced Phishing Protection notifications for protecting passwords from reuse.
Notify Unsafe App
Configures Enhanced Phishing Protection notifications for protecting passwords typed into M365 Office applications, Notepad, and Wordpad.
Service Enabled
Enables Enhanced Phishing Protection in audit mode for Windows 11 H2.
Which configuration setting do I need to configure?
The settings below are based on an environment with Windows 11 with the latest updates and enrolled in Microsoft Defender for Endpoint.
Keep in mind, if your device is enrolled in Microsoft Defender for Endpoint, that you can allow or block specific websites and files only in the Microsoft Defender / security portal via indicators.
With that in mind, configure SmartScreen as securely as possible and allow only files, IP addresses, URLs/Domains, and certificates if needed. So make a good decision and think carefully about how strict and secure you make your configuration because your users also need to be able to work with it.
Administrative Templates - Windows Components > File Explorer
| Setting | Value |
|---|---|
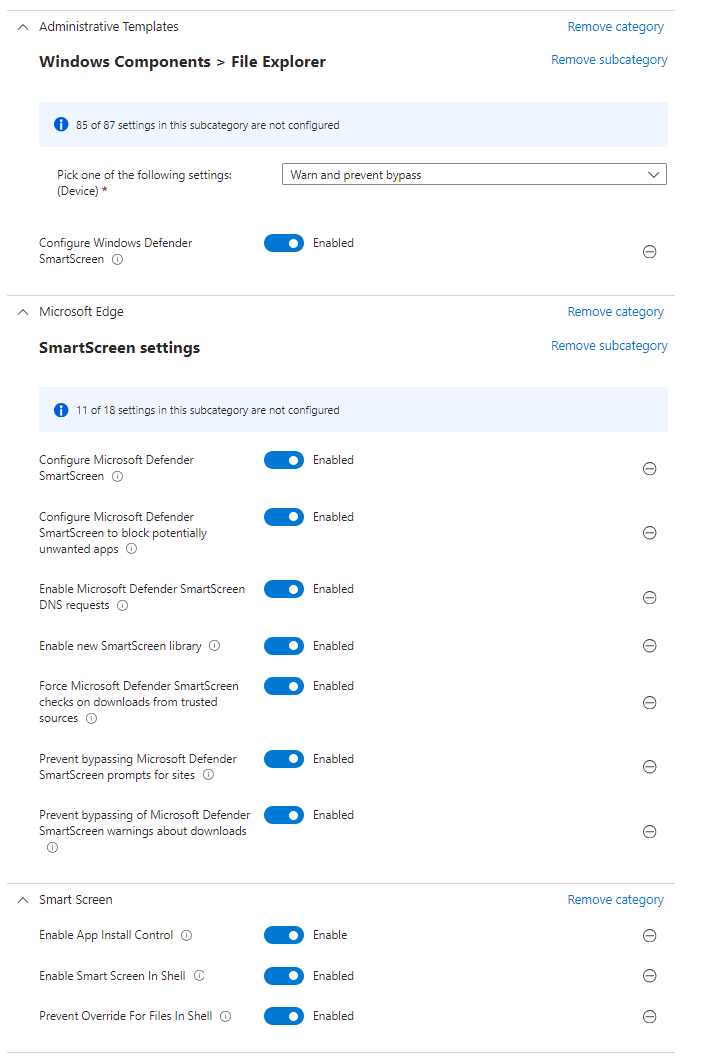
| Configure Windows Defender SmartScreen | Enabled – Warn and prevent bypass |
Microsoft Edge - SmartScreen Settings
| Setting | Value |
|---|---|
| Configure Microsoft Defender SmartScreen | Enabled |
| Configure Microsoft Defender SmartScreen to block potentially unwanted apps | Enabled |
| Enable Microsoft Defender SmartScreen DNS requests | Enabled |
| Enable new SmartScreen library | Enabled |
| Force Microsoft Defender SmartScreen checks on downloads from trusted sources | Enabled |
| Prevent bypassing Microsoft Defender SmartScreen prompts for sites | Enabled |
| Prevent bypassing of Microsoft Defender SmartScreen warnings about downloads | Enabled |
Smart Screen
| Setting | Value |
|---|---|
| Enable App Install Control | Enabled |
| Enable Smart Screen In Shell | Enabled |
| Prevent Override For Files In Shell | Enabled |
Smart Screen - Enhanced Phishing Protection
| Setting | Value |
|---|---|
| Notify Malicious | Enabled |
| Notify Password Reuse | Enabled |
| Notify Unsafe App | Enabled |
| Service Enabled | Enabled |
How to configure SmartScreen via Settings Catalog
- Open Microsoft Intune
- In the menu select Devices
- Under Devices, select Windows and select configuration profiles, or use the following link: Create a profile – Microsoft Intune admin center
- Click on + Create Profile

- Select Windows 10 and later as the platform and Settings Catalog as the profile type.
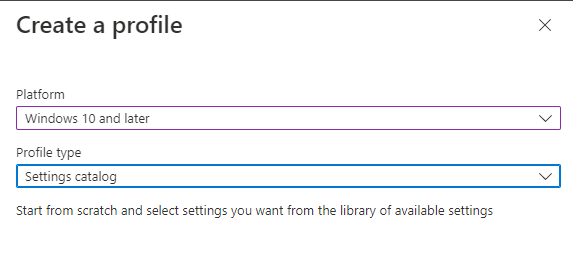
- Click on Create
- Provide a policy name, e.g., EndpointCave-PRD-Win-SmartScreen.
- Set a description, so that everyone with access to the portal knows the purpose.
- Click on Next
- Click on + Add settings, and search for the required settings.
- Check all the checkboxes for settings that you want to configure.
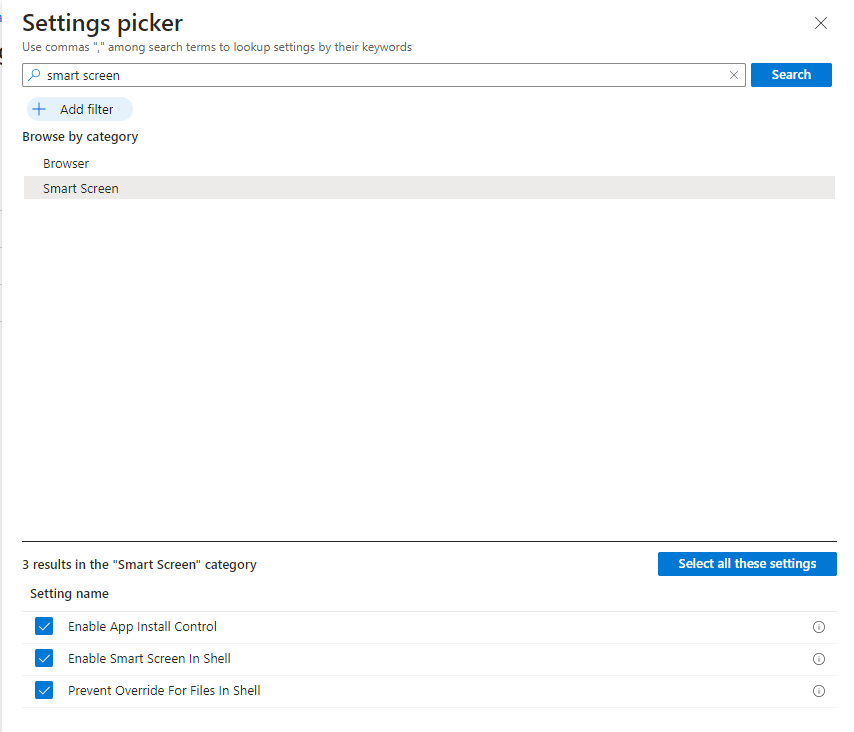
- Close the Settings Picker
- Enable and configure all the needed SmartScreen settings.
- Click on the Next button at the bottom of the page.
- Set a Scope tag if needed and click on Next.
- Assign the configuration policy to the correct group, set a filter if needed, and click on Next.
- On the review page + create page, review your configuration and click on Create
Test your Microsoft Defender SmartScreen configuration
If you want to validate if your SmartScreen configuration is working correctly, you can use Defender testground via UrlRep – Microsoft Defender Testground and AppRep – Microsoft Defender Testground.

You can use a scenario via testground via the following url:
- Microsoft Defender SmartScreen App Reputation Demos
- Microsoft Defender SmartScreen URL Reputation Demos
Results